Portfolio

Thursday, May 25/Tuesday, May 30

Learning Target(s):

  • Students will be able to include their 15 best photographs from the semester.
  • Students will be able to describe their personal style.
  • Students will be able to describe their future goals in photography.
  • Students will be able to describe their favorite photography assignment.


Portfolio

Students will use Power Point Online to create a Photography Portfolio to share their best work from the semester.

You MUST use the link sent to you by Ms. Myers.

You MUST use the link sent to you by Ms. Myers.

You MUST use the link sent to you by Ms. Myers.

You MUST use the link sent to you by Ms. Myers.

You MUST use the link sent to you by Ms. Myers.

You MUST use the link sent to you by Ms. Myers.

You MUST use the link sent to you by Ms. Myers.

You MUST use the link sent to you by Ms. Myers.

Requirements (this is a representation of your BEST work):

  • You MUST modify the background to something appropriate Your PP may not be unchanged (black and white).  It must look visually appealing.
  • You may NOT use photos from the white balance lab.
  • Photos must be in focus.
  • Photos must be cropped as needed.
  • You may change the layout of the slide.  What I am sending you is simply a template.

Slide #:

  1.  Name and date
  2. 2-16 are your best photos, each with a description–what assignment was it, why did you select the picture, what is good about it, what settings did you use (ISO, aperture, shutter), etc.

17. How would you describe your personal photography style?

18.  What was your favorite photo assignment and why? Include 2 photos.

19.  What are your future goals and/or direction regarding photography? Consider graphic design, hobby/pastime, etc.


Black and White/Value

Friday, May 5/Tuesday, May 9

Learning Target(s):

  • Students will be able to identify and define value in photography.
  • Students will be able to create photographs that demonstrate VALUE/BLACK AND WHITE.
  • Students will be able to create a blog post that includes 8 value images.

Look Fors:

  • I can define value.
  • I can capture EIGHT images in a selected mode that demonstrate value.
  • All of my photographs have different subjects.
  • I can post a blog post titled: VALUE/BLACK AND WHITE LAB with all EIGHT images and labels.

VALUE/BLACK AND WHITE LAB

For today’s class, we will be delving into the aspects of VALUE (black and white) in photographs.  Please follow along with me as we discuss.

VALUE:

What is value in an image?
VALUE is a description of an area’s relative lightness or darkness. Therefore, it relates to a greyscale more than the color wheel. In a sense, value mostly ignores hue and operates only on the level of how much tint (addition of white), or shade (addition of black), a color may have.
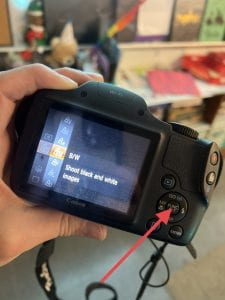


Photo 1

____/1 points for how well your photos demonstrate the assigned element.

____/1points for well composed, interesting photographs.  Think about more than just your assignment image when taking your photograph.

____/1 points for technical aspects of your photos.  Consider focus, exposure, adjustments, correct lighting, white balance, etc.

Photo 2

____/1points for how well your photos demonstrate the assigned element.

____/1points for well composed, interesting photographs.  Think about more than just your assignment image when taking your photograph.

____/1 points for technical aspects of your photos.  Consider focus, exposure, adjustments, correct lighting, white balance, etc.

Photo 3

____/1points for how well your photos demonstrate the assigned element.

____/1 points for well composed, interesting photographs.  Think about more than just your assignment image when taking your photograph.

____/1 points for technical aspects of your photos.  Consider focus, exposure, adjustments, correct lighting, white balance, etc.

Photo 4

____/1 points for how well your photos demonstrate the assigned element.

____/1 points for well composed, interesting photographs.  Think about more than just your assignment image when taking your photograph.

____/1 points for technical aspects of your photos.  Consider focus, exposure, adjustments, correct lighting, white balance, etc.

Photo 5

____/1 points for how well your photos demonstrate the assigned element.

____/1 points for well composed, interesting photographs.  Think about more than just your assignment image when taking your photograph.

____/1 points for technical aspects of your photos.  Consider focus, exposure, adjustments, correct lighting, white balance, etc.

Photo 6

____/1 points for how well your photos demonstrate the assigned element.

____/1 points for well composed, interesting photographs.  Think about more than just your assignment image when taking your photograph.

____/3 points for technical aspects of your photos.  Consider focus, exposure, adjustments, correct lighting, white balance, etc.

Photo 7

____/1 points for how well your photos demonstrate the assigned element.

____/1 points for well composed, interesting photographs.  Think about more than just your assignment image when taking your photograph.

____/1 points for technical aspects of your photos.  Consider focus, exposure, adjustments, correct lighting, white balance, etc.

Photo 8

____/1 points for how well your photos demonstrate the assigned element.

____/1 points for well composed, interesting photographs.  Think about more than just your assignment image when taking your photograph.

____/1 points for technical aspects of your photos.  Consider focus, exposure, adjustments, correct lighting, white balance, etc.

___/ 24 Total


VALUE/BLACK AND WHITE LAB

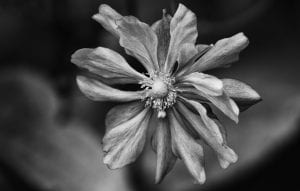
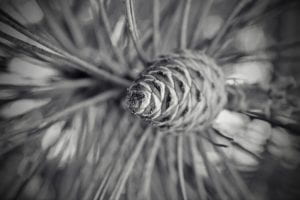
  1.  Using  a mode of your choice, capture six images that demonstrate value/black and white.

2. Post all SIX images in a blog post titled: VALUE/BLACK AND WHITE LAB.


VALUE/BLACK AND WHITE LAB
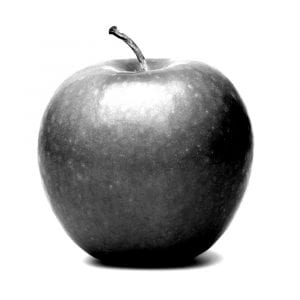
 

ISO:       SHUTTER:      APERTURE:

2.
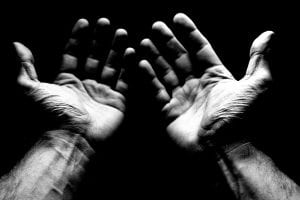
 

ISO:       SHUTTER:      APERTURE:

3.
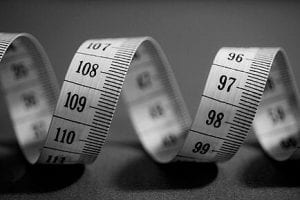
 

ISO:       SHUTTER:      APERTURE:

4.


ISO:       SHUTTER:      APERTURE:

5.
 

ISO:       SHUTTER:      APERTURE:

6.
 

ISO:       SHUTTER:      APERTURE:

Color Lab

Tuesday, April 25/Thursday, April 27

Learning Target(s):

  • Students will be able to identify and define monochromatic, complimentary, and analogous color schemes.
  • Students will be able to create photographs that demonstrate color.
  • Students will be able to create a blog post that includes  monochromatic, complimentary, and analogous color schemes.

Look Fors:

  • I can define monochromatic, complimentary, and analogous color schemes.
  • I can identify lines in the photographs presented.
  • I can capture SIX images in a selected mode that demonstrate monochromatic, complimentary, and analogous color schemes.
  • I can post a blog post titled: Lines  with all SIX images and labels.

Color Lab and Blog Post

For today’s class, we will be delving into the aspects of color in photographs.  Please follow along with me as we discuss.


Photo 1

____/1 points for how well your photos demonstrate the assigned element.

____/1points for well composed, interesting photographs.  Think about more than just your assignment image when taking your photograph.

____/2 points for technical aspects of your photos.  Consider focus, exposure, adjustments, correct lighting, white balance, etc.

Photo 2

____/1points for how well your photos demonstrate the assigned element.

____/1points for well composed, interesting photographs.  Think about more than just your assignment image when taking your photograph.

____/2 points for technical aspects of your photos.  Consider focus, exposure, adjustments, correct lighting, white balance, etc.

Photo 3

____/1points for how well your photos demonstrate the assigned element.

____/1 points for well composed, interesting photographs.  Think about more than just your assignment image when taking your photograph.

____/2 points for technical aspects of your photos.  Consider focus, exposure, adjustments, correct lighting, white balance, etc.

Photo 4

____/1 points for how well your photos demonstrate the assigned element.

____/1 points for well composed, interesting photographs.  Think about more than just your assignment image when taking your photograph.

____/2 points for technical aspects of your photos.  Consider focus, exposure, adjustments, correct lighting, white balance, etc.

Photo 5

____/1 points for how well your photos demonstrate the assigned element.

____/1 points for well composed, interesting photographs.  Think about more than just your assignment image when taking your photograph.

____/2 points for technical aspects of your photos.  Consider focus, exposure, adjustments, correct lighting, white balance, etc.

Photo 6

____/1 points for how well your photos demonstrate the assigned element.

____/1 points for well composed, interesting photographs.  Think about more than just your assignment image when taking your photograph.

____/2 points for technical aspects of your photos.  Consider focus, exposure, adjustments, correct lighting, white balance, etc.

___/ 24 Total


Color Lab and Blog Post

  1.  Using  a mode of your choice, capture six images that demonstrate two monochromatic,  2 complimentary, and 2 analogous color schemes.

2. Post all SIX images in a blog post titled: Color Lab and Blog Post.


Color Lab and Blog Post

  1. MONOCHROMATIC WITH 5+ OBJECTST

ISO:       SHUTTER:      APERTURE:

2. MONOCHROMATIC WITH 5+ OBJECTS

ISO:       SHUTTER:      APERTURE:

3. COMPLIMENTARY 1

ISO:       SHUTTER:      APERTURE:

4. COMPLIMENTARY 2

ISO:       SHUTTER:      APERTURE:

5. ANALOGOUS

ISO:       SHUTTER:      APERTURE:

6. ANALOGOUS

ISO:       SHUTTER:      APERTURE:

Lines Lab

Wednesday, April 19/Friday, April 21

Learning Target(s):

  • Students will be able to identify and define horizontal, vertical, and leading lines.
  • Students will be able to create photographs that demonstrate lines.
  • Students will be able to create a blog post that includes  vertical, horizontal, and leading lines.

Look Fors:

  • I can define vertical, horizontal, and leading lines.
  • I can identify lines in the photographs presented.
  • I can capture SIX images in a selected mode that demonstrate vertical, horizontal, and leading lines.
  • I can post a blog post titled: Lines  with all SIX images and labels.

Lines Lab and Blog Post

For today’s class, we will be delving into the aspects of Lines.  Please follow along with me as we discuss.

CLICK HERE FOR THE POWER POINT


Photo 1

____/1 points for how well your photos demonstrate the assigned element.

____/1points for well composed, interesting photographs.  Think about more than just your assignment image when taking your photograph.

____/2 points for technical aspects of your photos.  Consider focus, exposure, adjustments, correct lighting, white balance, etc.

Photo 2

____/1points for how well your photos demonstrate the assigned element.

____/1points for well composed, interesting photographs.  Think about more than just your assignment image when taking your photograph.

____/2 points for technical aspects of your photos.  Consider focus, exposure, adjustments, correct lighting, white balance, etc.

Photo 3

____/1points for how well your photos demonstrate the assigned element.

____/1 points for well composed, interesting photographs.  Think about more than just your assignment image when taking your photograph.

____/2 points for technical aspects of your photos.  Consider focus, exposure, adjustments, correct lighting, white balance, etc.

Photo 4

____/1 points for how well your photos demonstrate the assigned element.

____/1 points for well composed, interesting photographs.  Think about more than just your assignment image when taking your photograph.

____/2 points for technical aspects of your photos.  Consider focus, exposure, adjustments, correct lighting, white balance, etc.

Photo 5

____/1 points for how well your photos demonstrate the assigned element.

____/1 points for well composed, interesting photographs.  Think about more than just your assignment image when taking your photograph.

____/2 points for technical aspects of your photos.  Consider focus, exposure, adjustments, correct lighting, white balance, etc.

Photo 6

____/1 points for how well your photos demonstrate the assigned element.

____/1 points for well composed, interesting photographs.  Think about more than just your assignment image when taking your photograph.

____/2 points for technical aspects of your photos.  Consider focus, exposure, adjustments, correct lighting, white balance, etc.

___/ 24 Total


Lines Lab and Blog Post

  1.  Using  a mode of your choice, capture six images that demonstrate  vertical lines (2), horizontal lines (2), and leading lines (2).

2. Post all SIX images in a blog post titled: Lines Lab and Blog Post.


Lines Lab and Blog Post

  1. Horizontal Line(s)

ISO:       SHUTTER:      APERTURE:

2. Horizontal Line(s)

ISO:       SHUTTER:      APERTURE:

3. Vertical Line (s)

ISO:       SHUTTER:      APERTURE:

4. Vertical Line (s)

ISO:       SHUTTER:      APERTURE:

5. Leading Line(s)

ISO:       SHUTTER:      APERTURE:

6. Leading Line(s)

ISO:       SHUTTER:      APERTURE:

Rule of Thirds and Space

Thursday, April 13/Monday, April 17

Learning Target(s):

  • Students will be able to identify and define rule of thirds and space.
  • Students will be able to create photographs that demonstrate rule of thirds and space.
  • Students will be able to create a blog post that includes rule of thirds and space.

Look Fors:

  • I can define rule of thirds and space.
  • I can identify rule of thirds and space in the photographs presented.
  • I can capture FIVE images in a selected mode that demonstrate rule of thirds and space.
  • I can post a blog post titled: Rule of Thirds and Space with all FIVE images and labels.

Rule of Thirds and Space Lecture

For today’s class, we will be delving into the aspects of Rule of Thirds and Space.  Please follow along with me as we discuss.

CLICK HERE FOR THE POWER POINT


Rule of Thirds and Space: Photo 1

____/1 points for how well your photos demonstrate the assigned element.

____/1points for well composed, interesting photographs.  Think about more than just your assignment image when taking your photograph.

____/2 points for technical aspects of your photos.  Consider focus, exposure, adjustments, correct lighting, white balance, etc.

Rule of Thirds and Space: Photo 2

____/1 points for how well your photos demonstrate the assigned element.

____/1 points for well composed, interesting photographs.  Think about more than just your assignment image when taking your photograph.

____/1 points for technical aspects of your photos.  Consider focus, exposure, adjustments, correct lighting, white balance, etc.

Rule of Thirds and Space: Photo 3

____/1 points for how well your photos demonstrate the assigned element.

____/1 points for well composed, interesting photographs.  Think about more than just your assignment image when taking your photograph.

____/2 points for technical aspects of your photos.  Consider focus, exposure, adjustments, correct lighting, white balance, etc.

Rule of Thirds and Space: Photo 4

____/1 points for how well your photos demonstrate the assigned element.

____/1 points for well composed, interesting photographs.  Think about more than just your assignment image when taking your photograph.

____/2 points for technical aspects of your photos.  Consider focus, exposure, adjustments, correct lighting, white balance, etc.

Rule of Thirds and Space: Photo 5

____/1 points for how well your photos demonstrate the assigned element.

____/1 points for well composed, interesting photographs.  Think about more than just your assignment image when taking your photograph.

____/2 points for technical aspects of your photos.  Consider focus, exposure, adjustments, correct lighting, white balance, etc.

___/ 20 Total


Rule of Thirds and Space

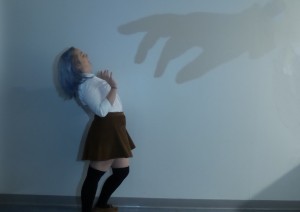
  1.  Using  a mode of your choice, capture five images that demonstrate rule of thirds AND space!

2. Post all FIVE images in a blog post titled: Rule of Thirds and Space.


 Rule of Thirds and Space Blog Post

  1. Rule of Thirds AND SPACE

ISO:       SHUTTER:      APERTURE:

2. Rule of Thirds AND SPACE

ISO:       SHUTTER:      APERTURE:
3. Rule of Thirds AND SPACE

ISO:       SHUTTER:      APERTURE:

4. Rule of Thirds AND SPACE

ISO:       SHUTTER:      APERTURE:

5.Rule of Thirds AND SPACE

ISO:       SHUTTER:      APERTURE:

Trick Photography

Monday, March 27/Thursday, March 29

Learning Target(s):

  • Students will be capture “trick” photography images.
  • Students will be able to compose and publish a blog post for the Trick Photography Lab.

Look Fors:

  • I can capture correctly exposed images using manual mode.
  • I can capture EIGHT DIFFERENT images that “trick” the perception of the viewer.
  • I can write and publish a blog post with all four images along with labels and photo information.

Performance of Understanding:

  • Trick Photography Lab and Blog Post

Trick Photography Lab

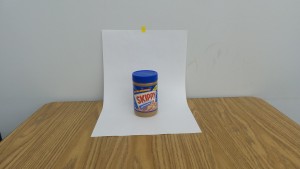
For today’s Trick Photography Lab you will capture EIGHT images that “trick” the perception of your viewer. The EIGHT images must be different in idea and nature, and perform separate “tricks.”  Additionally, your images should be composed well, without distracting elements, as well as properly exposed etc.

1.  Post your EIGHT images in a blog post titled: TRICK PHOTOGRAPHY LAB.  You will label each image with the category, as well as the ISO, shutter speed, and aperture, as demonstrated below.

2. When you have completed the blog post, please let me know so that I can score it.


TRICK PHOTOGRAPHY EXAMPLE POST

1.  

lauren-miller-trick-2

ISO:     SHUTTER:      APERTURE:

2. 

miranda-mcallister-self-portrait

ISO:     SHUTTER:      APERTURE:
3. 

trick lyxi morales 1

ISO:     SHUTTER:      APERTURE:

4. 

trick lyxi morales 2

ISO:     SHUTTER:      APERTURE:

5. 

{Insert Photo}

ISO:     SHUTTER:      APERTURE:

6. 

{Insert Photo}

ISO:     SHUTTER:      APERTURE:

7. 

{Insert Photo}

ISO:     SHUTTER:      APERTURE:

8. 

{Insert Photo}

ISO:     SHUTTER:      APERTURE:


White Balance Lab

Tuesday, March 21/Thursday, March 23


Learning Targets:

  • Students will be able to operate a camera in shutter priority or manual mode to achieve correctly exposed photographs.
  • Students will be able to change and set the white balance on the camera.

White Balance Lab

  1. Choose an area of the room and set up a scene with AT LEAST SEVEN inanimate objects (No cell phones, no stuffies, no chocolate bars…).
  2. You will use a piece of white paper as your backdrop.  Set your camera to shutter priority mode (FYI setting the WB is applicable in ALL shooting modes.)
  3. Locate your white balance setting in your camera’s menu.
  4. Set the camera to the first type of white balance setting, focus your camera, and take the photo.
  5. Continue through your settings taking a photo for each setting.

Remember you must correctly expose your photographs for them to count.

You will post all photos to a blog post titled: White Balance Lab.  You will copy and paste the information from the Example Blog Post (located below). You will replace your information with mine.


STEP 1:  USE TV instead

STEP 2:

STEP 3:

STEP 4:


EXAMPLE BLOG POST:

What type of lighting is illuminating your scene? Fluorescent-L

What is your aperture, shutter, and ISO set at?

A:

S:

ISO:

Are you focused and using a tripod/steady surface? Yes

Out Take   Outtake
Photo 1  AWB White Balance: Auto

Describe the background color:

Photo 2  Daylight White Balance: Daylight

Describe the background color:

Photo 3  Cloudy White Balance: Cloudy

Describe the background color:

Photo 4  Flourescent White Balance: Tungsten

Describe the background color:

Photo 5  Flourescent L White Balance: Fluorescent-L

Describe the background color:

Photo 6  Tungsten White Balance: Fluorescent-H

Describe the background color:

Reflection:  Which image looks the best (in terms of CORRECT color)?  Why? (You can not say auto…)  XXX looks the best because…

Blurred Motion

Monday, March 13/Wednesday, March 15

Learning Targets:

Students will be able to:

  • adjust shutter speed on the camera using the shutter priority mode.
  • demonstrate blurred motion.

Shutter Lab

Today you will be demonstrating your understanding of shutter speed.

Your task is to capture EIGHT blurred motion images using Shutter Priority mode.


Please note:

  • BLURRED MOTION:  USE 1″ OR LOWER AS NECESSARY.  
  • USING A TRIPOD (or set your camera on a steady surface) IS NECESSARY.
  • ONLY the object in motion should be blurred while the background is crisp.
  • Avoid distracting elements in the background (i.e., people, objects, etc.)
  • You may have to manipulate the shutter speed or the speed of your object to capture the motion.
  • If the object cannot be seen in the photo, it is not an acceptable photo to submit.
  • A shutter speed that is too low will allow too much light.  Adjust as needed.

Blog Post Example:

SHUTTER: Blurred Motion


 Photo #1

Aperture:     ISO:     Shutter Speed:


Photo #2

Aperture:     ISO:     Shutter Speed:


Photo #3

Aperture:     ISO:     Shutter Speed:


Photo #4

Aperture:     ISO:      Shutter Speed:


Photo #5

Aperture:     ISO:      Shutter Speed:


Photo #6

Aperture:     ISO:      Shutter Speed:

Photo #7

Aperture:     ISO:      Shutter Speed:

Photo #8

Aperture:     ISO:      Shutter Speed:


 Performance of Understanding:

  • Shutter: Stop Motion

Stop/Freeze Motion

Friday, March 3/Tuesday, March 7/Thursday, March 9

Learning Targets:

Students will be able to:

  • adjust shutter speed on the camera using the shutter priority mode.
  • demonstrate stop motion.

Shutter Lab

Today you will be demonstrating your understanding of shutter speed..

Your task is to capture eight stop motion images using Shutter Priority mode.


Please note:

  • FREEZE/STOP MOTION: 1/250 OR HIGHER AS NECESSARY
  • NONE of your photos should be shot below 1/250.
  • Your images should look good.  Put thought into them.  That is, for the stopped motion photos, there should be NO blur and the moving object should be completely stopped.  It should also be good in subject.
  • The entirety of the photo should be CRISP.
  • Avoid distracting elements in the background (i.e., people, objects, etc.)

Blog Post Example:

SHUTTER: Stop Motion


 Photo #1

Aperture:     ISO:     Shutter Speed:


Photo #2

Aperture:     ISO:     Shutter Speed:


Photo #3

Aperture:     ISO:     Shutter Speed:


Photo #4

Aperture:     ISO:      Shutter Speed:


Photo #5

Aperture:     ISO:      Shutter Speed:


Photo #6

Aperture:     ISO:      Shutter Speed:


Photo #7

Aperture:     ISO:      Shutter Speed:


Photo #8

Aperture:     ISO:      Shutter Speed:


 Performance of Understanding:

  • Shutter: Stop Motion

Aperture Lab

Thursday, February 21/Monday,  27


NEXT Lab:  Shutter Priority Lab (bring objects that can be set in motion!)


Learning Targets:

Students will be able to:

  • adjust the aperture on the camera using the aperture priority mode.
  • demonstrate short depth of field.
  • demonstrate long depth of field.

APERTURE LAB

Today you will be demonstrating your understanding of aperture.

Your task is to capture FOUR sets of images for a total of EIGHT:

  • One object shallow/short depth of field.
  • Same object long depth of field.
  • Your images should look exactly the same as far as content and setup.  Do not move your camera.  Simply change the aperture.

Once you have captured your FOUR sets that both show the short and long depth of fields as mentioned above, you will create a blog post.  The blog post will be named: APERTURE PRIORITY LAB.  Identify each photo with the type of it identifies, and list the ISO, shutter speed, and aperture used (demonstrated below).


Please note:

  • For shutter speeds longer than 250, use a tripod or place the camera on a stationary surface and use the timer.
  • Use the highest aperture possible to achieve a short depth of field (blurred background).
  • Use a the lowest aperture possible to achieve a long depth of field (clear foreground AND background).
  • Your images should look good.  That is, subjects and items in your images should be in focus in the appropriate areas.
  • For the shallow depth of field images, ONLY the background should be blurred.
  • Avoid distracting elements in the background (i.e., people, objects, etc.)
  • If your picture is out of focus, blurry, grainy, or has an overall drab or unaesthetic appearance, RESHOOT the photo.
  • Keep shooting different objects.  Give yourself a variety from which to choose.


Blog Post Example:


APERTURE PRIORITY LAB

SET ONE:

Short/Shallow Depth of Field:

Aperture: 3.4     ISO:         Shutter Speed:


Long Depth of Field:

Aperture: 8       ISO:          Shutter Speed:


SET TWO:

Short/Shallow Depth of Field:

Aperture:  3.4    ISO:         Shutter Speed:


Long Depth of Field:

Aperture: 8       ISO:          Shutter Speed:


SET THREE:

Short/Shallow Depth of Field:

Aperture: 3.4     ISO:         Shutter Speed:


Long Depth of Field:

Aperture: 8       ISO:          Shutter Speed:


SET FOUR:

Short/Shallow Depth of Field:

Aperture: 3.4     ISO:         Shutter Speed:


Long Depth of Field:

Aperture: 8       ISO:          Shutter Speed:

Skip to toolbar